The majority of vintage typewriters use a universal-sized typewriter ribbon making it simple, quick and easy to change the typewriter ribbon when you run out of ink.
We have more information about which typewriter ribbon to buy here.
Once you have the new typewriter ribbon you can replace this by following the easy guide below:
How to replace a typewriter ribbon with a new universal ribbon:
Step one:
Gather the necessary supplies: You will need a replacement typewriter ribbon that is compatible with your typewriter model. Typewriter ribbons are usually available at office supply stores or online.
Prepare your workspace: Find a clean and well-lit area to work on your typewriter. Clear any clutter and ensure you have enough space to maneuver.
Locate the ribbon cover: The ribbon cover is usually positioned on the top or front of the typewriter. It may be a hinged metal or plastic panel that can be opened to access the ribbon. Open the ribbon cover: Carefully lift or swing open the ribbon cover to expose the old ribbon and the spools.
Step two:
Remove the old ribbon: Look for the two spools that hold the old ribbon in place. They are typically located on either side of the typewriter. Release any clips or levers that secure the spools and carefully remove the old ribbon. Take note of how the ribbon is threaded through the guides to assist you during the reinstallation.
Step three:
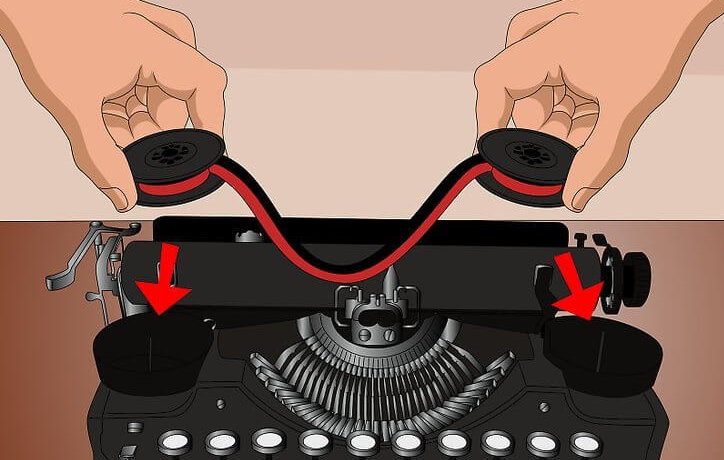
Prepare the new ribbon: Unpack your new typewriter ribbon and identify the two spools. Some ribbons may have an arrow indicating the direction in which the ribbon should thread. If not, ensure the ribbon is oriented properly with the inked side facing the paper.
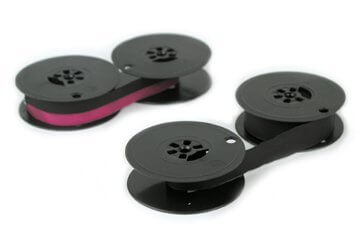
Insert the new spools: Begin by placing one of the spools in its designated location on the typewriter. Take the loose end of the ribbon and guide it through the various guides and around any necessary pulleys or tensioning mechanisms according to the threading pattern of the old ribbon. Ensure the ribbon is properly aligned and does not twist or tangle. Make sure the black ink is above the red ink and that the ribbon is coming around the spools. See image below.
Install the second spool: Once the ribbon is threaded correctly, position the second spool on its designated side of the typewriter. Make sure the ribbon remains taut but not overly stretched. Secure the spool with any clips or levers provided.
Step four:
Feed the ribbon through the small guides at the sides of the spools and through the ribbon carrier. Flick the key hammers back down and disengage the shift lock.
Test the ribbon: Gently turn the typewriter’s mechanism by hand to ensure the ribbon advances smoothly and is properly aligned. Check that the ribbon reverses direction when you press the carriage return key or use the appropriate mechanism for your typewriter.
Close the ribbon cover: Once you are satisfied with the ribbon installation, carefully close the ribbon cover until it clicks or locks into place.
With these steps, you should be able to successfully change the ribbon on your typewriter. However, it’s always a good idea to consult the user manual specific to your typewriter model for any additional instructions or nuances related to ribbon replacement.
Replacing new typewriter ribbon on original spools
If your typewriter uses smaller spools you can follow the simple steps below to wind a universal ribbon onto the original spools:
Step 1 – Remove the old ribbon from the original spools
Gather the necessary supplies: You will need a replacement typewriter ribbon that is compatible with your typewriter model. Typewriter ribbons are usually available at office supply stores or online.
Prepare your workspace: Find a clean and well-lit area to work on your typewriter. Clear any clutter and ensure you have enough space to maneuver.
Locate the ribbon cover: The ribbon cover is usually positioned on the top or front of the typewriter. It may be a hinged metal or plastic panel that can be opened to access the ribbon.
Open the ribbon cover: Carefully lift or swing open the ribbon cover to expose the old ribbon and the spools.
Remove the old ribbon: Look for the two spools that hold the old ribbon in place. They are typically located on either side of the typewriter. Release any clips or levers that secure the spools and carefully remove the old ribbon. Be careful to keep any clips that may hold the ribbon onto the spools or any screws that may hold the spools onto the typewriter. Some ribbons are held in place on the spool using a clip, while others are attached by a spike. Take note of how the ribbon is threaded through the guides to assist you during the reinstallation.
Once the spools are both empty you are ready to install the new ribbon.
Step 2 – Installing new ribbon
For this job, it is best to use some rubber gloves. Winding ribbon soaked in ink can be pretty messy!
Remove one end of the ribbon from the new spools and unhook it from the spool. You might find it easier to cut the ribbon off as close to the spool as possible.
Attach the end of the new ribbon onto the spike of one of the old empty spools or clip the ribbon onto one of the old empty spools as necessary. Notice the direction of the spike, because you will be winding the ribbon onto the old spool in the opposite direction. (Otherwise the ribbon will come loose).
Step 3 – Filling the Spools
Carefully wind the new ribbon onto the old spool while
Allowing the spools to roll like wheels (so lightly hold the middle of the spools only) this will unravel the new ribbon from the full spool.
Keep doing this until all the new ribbon is wound onto your old spool. When you have finished the once full new spool should now be empty and showing its spike or clip. Cut the ribbon off the spike of the now empty new spool and attach it to the spike on remaining empty old spool.
Replace the original spools with the new ribbon back into the typewriter and start typing again with fresh ink!
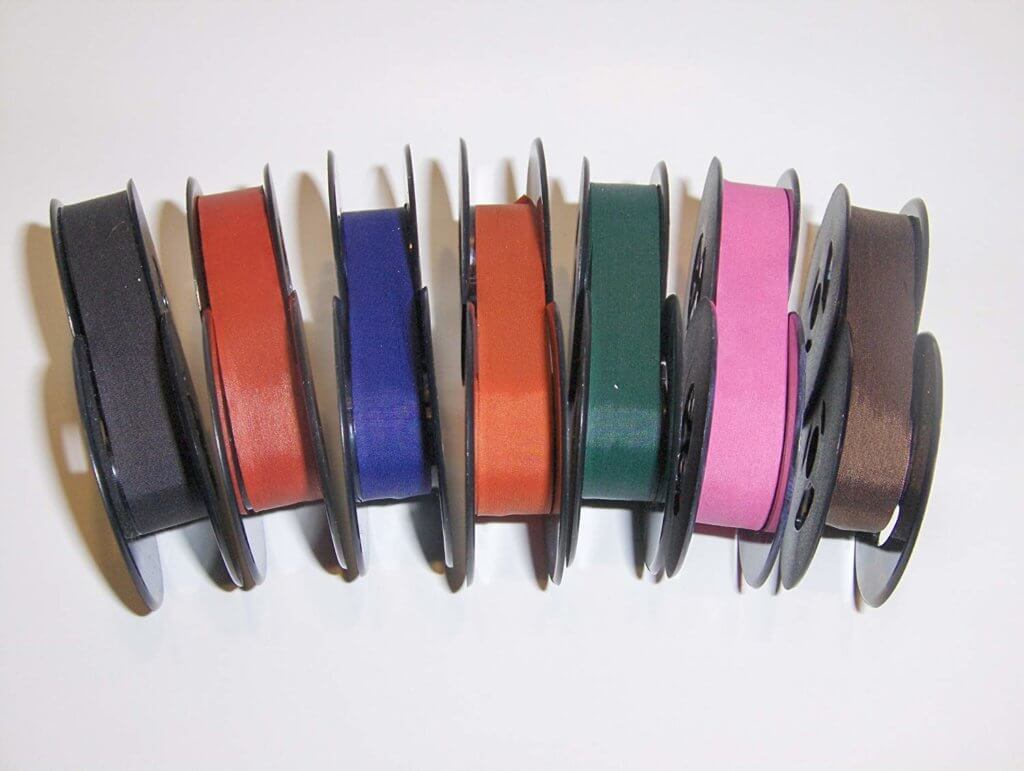
Replacement universal ribbons
If you are not sure which ribbon to buy, check our post on The Best Ribbons for your vintage typewriter. Below is a link to universal-sized ribbons that are easily purchased on Amazon for a low price.
Add some color to your writing!
We get asked a lot about where to find different color ribbons. Below is a link to this supplier of multi-colour ribbons also on Amazon.
Our Typewriter Coloring Book is here!
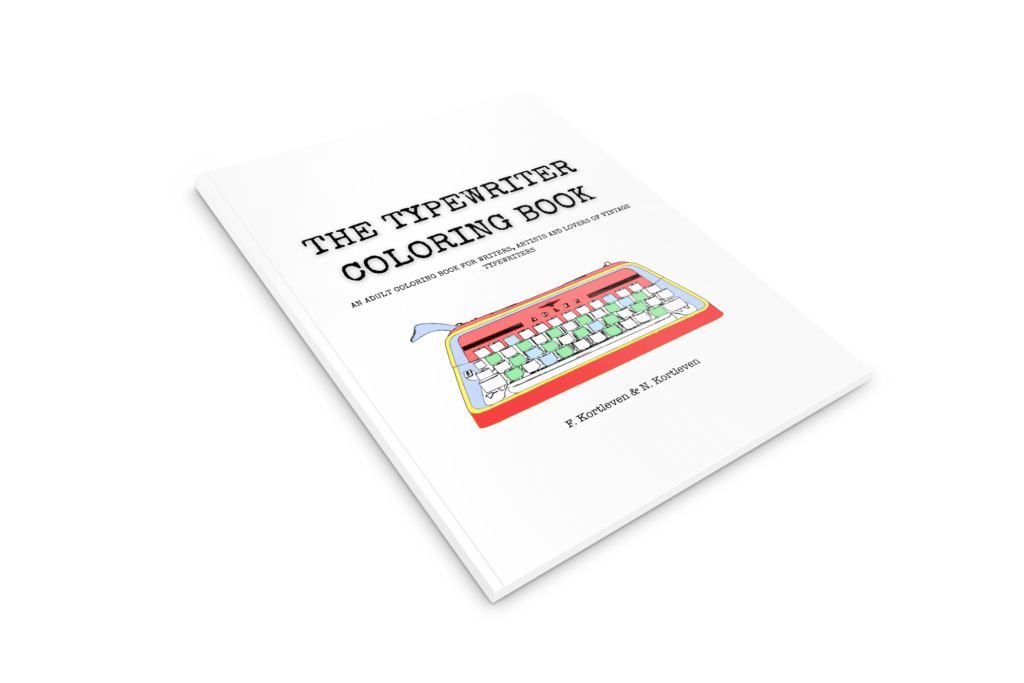
The Typewriter Coloring Book features some of the many typewriters we have had in store. We loved creating fantastic coloring pages from real typewriters. The Typewriter Coloring Book has more than 30 coloring pages of fabulous retro and vintage typewriters. We also added interesting facts and information about typewriters for you to enjoy.
We love sharing our passion for typewriters and The Typewriter Coloring Book is another way for us to share the joy of typewriters with even more people. Grab your copy today or give one away as a gift.